Honeycomb 10 - Materials and Scene Setup
how to do the thing, tutorial, blender, cycles, honeycomb
Posted in Motion || Posted on 2014-06-28 08:37:45
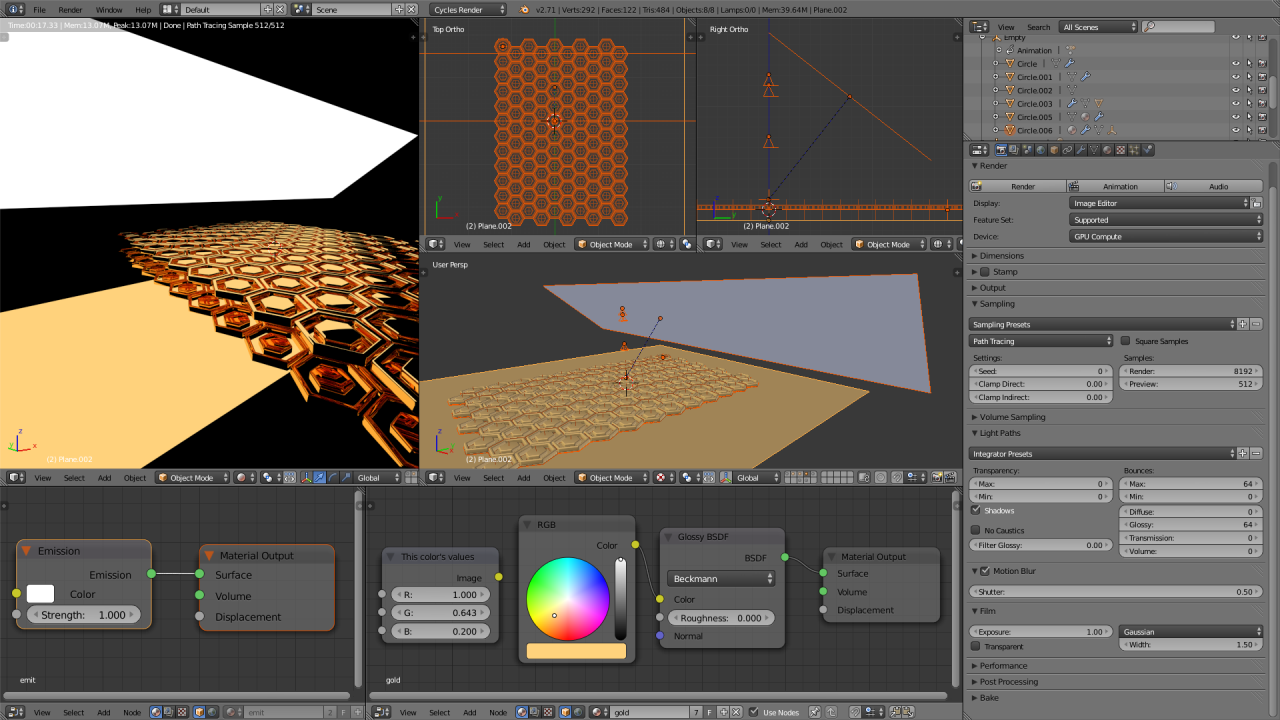
Does anyone remember my Honeycomb GIF set? Particularly revision 10? A few people have asked me about how I set up that scene in Blender, so I arranged this screenshot to get all of the important elements in at once. It’s actually surprisingly simple, considering how polished the output looks.
There are only two materials used in this scene. The material ‘emit’ has an Emission shader with a Color of perfect white, and a Strength of 1.000. The 'gold’ material has a Glossy shader with a Color of RGB(1.000, 0.643, 0.200), and a Roughness of 0.000, so it’s perfectly reflective.
There are effectively 4 objects in the scene as well. There is the ground plane which uses the 'gold’ material. There is the hexagonal lattice placed just above that gold ground plane, which uses the 'gold’ material as well. Then above the lattice and the ground plane, there’s the Camera, and there’s really nothing special about what’s going on in there. Last, I have a flat plane above all of the rest of the scene, using the 'emit’ material, casting light down at a 45 degree angle on everything.
As for the render settings, there’s not a whole lot of special going on there either - except since I know that I don’t have any Transparent, Diffuse, Transmission or Volume materials in the scene, I turned their 'bounces’ all to 0 in the Light Paths pane of the Render Settings tab, and that was pretty much it.
Any questions? I’ll be happy to answer them in the Imgur comments. :)
Also, thanks to Hexeosis for reblogging “Honeycomb 10 Close”, because that made my day today. :)